Your College Kid Is Staying Home: What To Do With Their Stuff
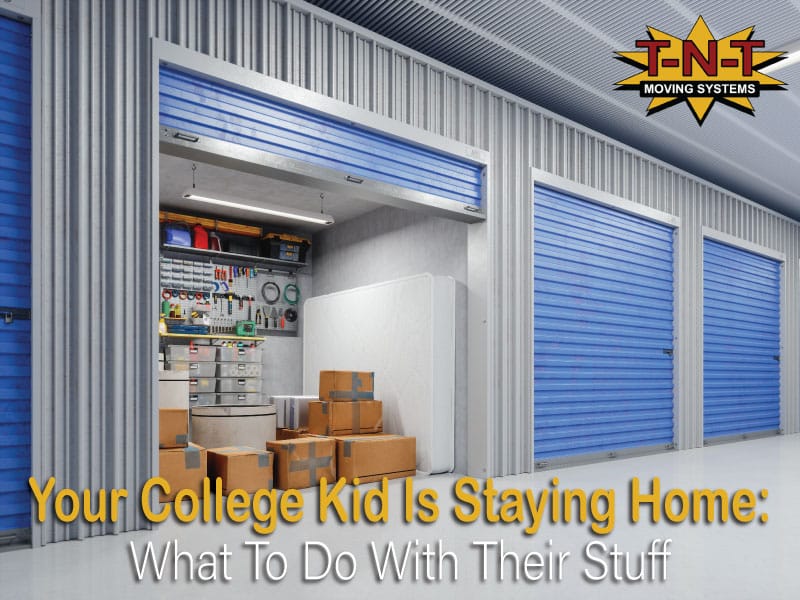
Your college kid moved back for the summer and has decided to take an extended break and stay home. Or, maybe they’ve enrolled in an online program and don’t need to move away to study. Either way, you have all their belongings in your house.
What will you do will all the extra stuff?
Many parents are eager to clear up space once their son or daughter reaches college age, especially if they’re the youngest child. And if your kid is moving stuff back into your home after being away, it can present even more challenges.
But don’t worry, TNT Moving Systems is here to help you figure out this conundrum. In this article, we’ll discuss evaluating what to keep, how to choose the right storage unit, and more. You’re well on your way to a clutter-free, happy family life!
Determining What Stays (and Goes)
One of the most important things to do when you have extra belongings is to determine what to put into storage. While you want to involve your child in these decisions as much as possible, remember that you’re the parent and it’s your house.
Ask your son or daughter to figure out which items they need at home and which can be stored, donated, or sold. If they procrastinate, consider giving them a deadline before you choose what stays and goes!
If you’re like most parents, you probably have a sentimental attachment to your child’s belongings. After all, they represent a time in their life when they were growing and learning. But if you’re running out of space in your home, you must be practical about what to keep and what to get rid of. Here are a few tips to help you make the right decision:
Keep items that have sentimental value.
If an item holds special meaning for you or your child, it’s worth keeping, even if it’s not particularly valuable. For example, you might want to keep your child’s baby clothes or their graduation tassel.
Get rid of items that are damaged or no longer usable.
If an item is damaged beyond repair or it’s no longer safe to use, it’s time to let it go. This includes clothes with holes in them, broken electronics, and falling apart furniture. And don’t make the mistake of putting them aside for repair at a later date; just let it go!
Consider whether you have the space to store an item.
An item probably isn’t worth keeping if you don’t have the space for it or you would have to get rid of more important things to make space. This is especially true for oversized items like furniture.
Decide whether you or your child will ever use the item again.
You should also say goodbye to any items you or your child are unlikely to ever use again. This includes anything out of style or no longer needed, such as old textbooks or gaming consoles. For clothing and other non-sentimental items, ask your child if they’ve used them in the last year. If not, they’ll probably never use it again.
Choosing the Right Storage Unit
Now that you’ve sorted through your belongings, it’s time to find a place to store them. Many families rent a storage unit, which can be an excellent option if you don’t have the space at home. But there are a few questions to answer before committing to a specific unit, such as:
What size do you need?
One of the most important things to consider is how much space you’ll need. You don’t want to pay for too much square footage, but you also don’t want to cram everything into a small space. Be sure to measure the items you plan to store so you can estimate the unit size you’ll need.
Do you need a climate-controlled unit?
If you’re storing items that are sensitive to temperature or humidity, you’ll need to get a climate-controlled storage unit. This is typically more expensive than a regular unit, but it’s worth it to protect your belongings.
How long do you need the unit?
Most storage units are rented month-to-month, but some facilities offer discounts to customers paying for a longer period upfront. For example, many storage companies offer a 12-month rate that’s lower than the monthly rate.
Also, keep in mind that some storage facilities increase the monthly rate automatically after four months. So, if you rent a 10×10 unit for $140, your unit might cost $230 after four months. Paying for a year will allow you to sidestep the price increase and save hundreds.
Packing Your Belongings Correctly
Once you’ve chosen the right storage unit, it’s time to start packing your things. Make sure you use quality boxes and materials, clearly label your boxes, and strategize how you pack each item.
Use sturdy moving boxes.
You’ll need strong, durable boxes that can stack on top of each other without collapsing. Don’t use old boxes that have been sitting in your basement for years because they could give out at any moment.
Label your boxes.
Labeling your moving boxes might seem unnecessary, but it’s one of the most critical steps in packing. By labeling your boxes, you’ll know exactly what’s inside them and where they should go in your new home. You’ll also make it easier for your movers to unpack everything when they arrive.
There are a few different ways to label your boxes. One option is to use a stick-on label or marker that will stay on through transit. Another option is to attach a pre-printed label to the box; only buy labels specifically designed for moving, as regular labels might come off in transit.
You could also write the information directly on the box. While this method isn’t as visually appealing as labels or markers, it guarantees that the information will be on your boxes when you get to the new home. Plus, it’s free!
Use packing materials.
To protect your belongings, use packing paper, bubble wrap, or foam peanuts. These materials will cushion your items and prevent them from breaking. You can usually find packing materials at local hardware stores or major retailers.
If you’re short on packing materials, you can use blankets, towels, or clothes to wrap around fragile items. Just don’t use anything you’ll need for the move.
Pack heavier items in smaller boxes.
It’s best to avoid putting too many heavy items in one box because it will make the box too heavy to lift and could cause it to break. Instead, use smaller boxes and pack fewer heavy items in each one.
Some items, such as books, can be challenging to pack because of their weight. Packing the books tightly together in a smaller box will make your job much easier. You can also use a rolling suitcase to transport heavy items.
Pack lighter items in larger boxes.
Use larger boxes for lightweight items, such as clothes and pillows. This will make it easier to pack the items and prevent the box from becoming too heavy to lift.
When packing clothes, try to fit everything into one box instead of packing each item individually. You can pack a lot of clothes without adding too much weight, and you’ll save time and space.
Pack boxes tightly.
Another tactic to consider is packing each box tightly to prevent items from shifting during the move. Use packing materials to fill in gaps and ensure the items are snug. Try to avoid leaving any empty space in the box if possible.
You’ll also want to use packing materials to create a barrier between fragile items. This will prevent them from moving around and breaking.
Stack boxes wisely.
When loading the moving truck, make sure you stack the boxes carefully. Heavier boxes should go on the bottom while lighter boxes go on the top. You should also avoid stacking boxes too high, as this could make them unstable and cause them to fall. And put fragile items in a safe spot where they’re less likely to get damaged.
Pack delicate items with care.
To prevent breakage, wrap each delicate item individually. You might want to use a dish packing kit for your breakables. These kits come with packing materials and boxes that are specifically designed for dishes.
If you don’t have a dish packing kit, you can use packing paper, bubble wrap, or foam peanuts to protect your delicate items. Remember to pack them tightly together to prevent them from moving around and breaking.
Take inventory of what’s in each box.
As you pack each box, make a list of the items inside. You can use a simple notebook to write down the contents of each box or create an inventory list on your computer.
If you have a lot of boxes, it might be helpful to number each one. This will make it easier to keep track of your belongings and make sure nothing gets lost during the move. After packing all your boxes, check each one off your list to confirm everything made it into the box.
Transporting Your Belongings to the Storage Unit
Now that your belongings are packed and ready to go, it’s time to transport them to the storage unit. If you’re using a rental truck, make sure to load the boxes carefully. Heavier boxes should go on the bottom while lighter boxes go on the top.
If you’re using your own vehicle, you can load the boxes into the trunk or backseat. Just make sure they’re secure while you’re driving. The safest and easiest method is to hire local pros like TNT Moving Systems to load, transport, and unload your kid’s items!
When you arrive at your storage unit, be sure to stack your boxes in a neat and organized manner in your unit. If possible, follow the same process of stacking the heaviest boxes on the bottom and the lightest on the top; that way, your things will be safer and you’ll be able to find specific items more quickly.
How Do You Get Rid of Stuff?
We’ve discussed putting your kid’s things into storage, but what are some other options? Here are a few things to consider for some (or all ) of the extra stuff cluttering up your home:
- Donate clothes, books, and other items to charity.
- Sell furniture and other belongings on Craigslist or eBay.
- Have a garage sale to get rid of everything quickly and easily.
- Give items to friends or family members who could use them.
Getting rid of your kid’s stuff can be tough, but it’s essential to make room for their return (or stay). And, with a little effort, you can clear out the clutter and make some extra cash in the process!
Wrapping Up
When your college kid is moving back home, the last thing you want is their stuff cluttering up your house. A little planning can make the transition smoother for everyone involved.
By renting a storage unit, you can keep their belongings safe and out of the way until they’re ready to move back out on their own. Besides, the act of decluttering your home itself can reduce household stress and keep the entire family happy!
